How To Easily Set Up OpenLDAP and Matrix Synapse with Potluck Images
Introduction
This is a post about running your own Matrix-Synapse instance using Pot jails.
You will see that once the initial (and also not very complicated) configuration is complete, it takes only 6 commands to e.g. run a complete openldap server if you are using the Potluck container images.
It’s a detailed HOWTO run Consul, OpenLDAP and Matrix-Synapse together using Pot jails.
Hint: If you do not want to go through the complete step by step guide, you can also skip directly to the end of this article and download the Openldap-Matrix-Sampler.
What is Pot?
Pot is “another container framework based on jails, to run FreeBSD containers on FreeBSD. Every running instance is called pot , like the one that I use to cook all the different type of pasta. It’s heavily based on FreeBSD, in particular on jails, ZFS, pf and rctl.”
Potluck images make use of Pot to create deployable jails. Potluck images themselves are application-specific deployable pot jails (container images). Many require some integration with other pot jails, such as consul.
What is Matrix-Synapse?
“Matrix is an open standard for communications on the internet, supporting federation, encryption and VoIP.” “Synapse is an open-source Matrix homeserver written and maintained by the Matrix.org Foundation.”
You can find a list of Matrix clients to connect to this or other servers at https://matrix.org/clients/
What is Consul?
“HashiCorp Consul is a service networking solution that enables teams to manage secure network connectivity between services and across on-prem and multi-cloud environments and runtimes. Consul offers service discovery, service mesh, traffic management, and automated updates to network infrastructure device.”
Basic FreeBSD Configuration
Prerequisites
We need to setup some basic settings on a FreeBSD 13.1 host dedicated to running pot jails:
sysrc gateway_enable="YES"
sysctl -w security.jail.allow_raw_sockets=1
sysctl -w net.inet.ip.forwarding=1
echo "security.jail.allow_raw_sockets=1" >> /etc/sysctl.conf
echo "net.inet.ip.forwarding=1" >> /etc/sysctl.conf
sysrc clear_tmp_enable="YES"
Networking
Next add an IP alias for the internal address range we need.
Adjust the network interface igb0 and address according to your network below and in the other steps of this howto:
$ ifconfig igb0 10.20.0.1 netmask 255.255.255.255 alias
And add to /etc/rc.conf:
$ sysrc ifconfig_igb0_alias0="10.20.0.1 netmask 255.255.255.255"
Reboot or restart networking and routing
Create ZFS Datasets
The following ZFS datasets are expected to be present:
$ zfs create -o mountpoint=/mnt/srv zroot/srv
$ zfs create -o mountpoint=/mnt/data zroot/data
$ zfs create -o mountpoint=/mnt/data/jaildata zroot/data/jaildata
$ zfs create -o mountpoint=/mnt/data/jaildata/openldap zroot/data/jaildata/openldap
$ zfs create -o mountpoint=/mnt/data/jaildata/matrix zroot/data/jaildata/matrix
Package Installation and pot Configuration
Install Packages
pkg$ install -y bash curl sudo python39 go119 gmake rsync tmux jq dmidecode pftop openssl nmap consul pot potnet
Setup pot.conf and Enable the Service
$ pot init -v
$ service pot enable
consul Client Configuration On Host
Configure consul Client, But Don’t Start It Yet
$ mkdir -p /usr/local/etc/consul.d
$ chmod 0750 /usr/local/etc/consul.d
You need to adjust the IP addresses, datacenter name and gossip key (encrypt field) below:
$ cat >/usr/local/etc/consul.d/agent.json<<EOF
{
  "bind_addr": "192.168.88.90",
  "client_addr": "127.0.0.1",
  "server": false,
  "node_name": bsdtmp,
  "datacenter": "mydc",
  "log_level": "WARN",
  "data_dir": "/var/db/consul",
  "verify_incoming": false,
  "verify_outgoing": false,
  "verify_server_hostname": false,
  "verify_incoming_rpc": false,
  "encrypt": "BBtPyNSRI+/iP8RHB514CZ5By3x1jJLu4SqTVzM4gPA=",
  "enable_syslog": true,
  "leave_on_terminate": true,
  "start_join": [
    "{{ consul_ip }}"
  ],
  "telemetry": {
    "prometheus_retention_time": "24h"
  }
}
EOF
Set Permissions
$ chmod 0600 /usr/local/etc/consul.d/agent.json
$ hown -R consul:wheel /usr/local/etc/consul.d/
Setup Logs and Enable Service
$ mkdir -p /var/log/consul
$ touch /var/log/consul/consul.log
$ service consul enable
Run consul Server As Potluck Image
Download The consul Image
$ pot import -p consul-amd64-13_1 -t 2.2.1 -U https://potluck.honeyguide.net/consul
Setup and Start The consul Image
Adjust the gossip key (see consul client installation above), network interface and interface name below:
$ pot clone \
  -P consul-amd64-13_1_2_2_1 \
  -p consul-clone \
  -N alias -i "igb0|10.20.0.2"
$ pot set-env -p consul-clone \
  -E DATACENTER=mydc \
  -E NODENAME=consul \
  -E IP=10.20.0.2 \
  -E BOOTSTRAP=1 \
  -E PEERS="1.2.3.4" \
  -E GOSSIPKEY="BBtPyNSRI+/iP8RHB514CZ5By3x1jJLu4SqTVzM4gPA="
$ pot set-attr -p consul-clone -A start-at-boot -V True
$ pot start consul-clone
That is all you need to do to run a consul server if you are using Potluck!
Start The consul client
After the consul pot has started, you can now start the consul client as it now can find the consul server:
$ service consul start
If all went well you should see something like this:
$ consul members
Node    Address             Status  Type    Build   Protocol  DC    Partition  Segment
consul  10.20.0.2:8301      alive   server  1.12.4  2         mydc  default    <all>
bsdtmp  192.168.88.90:8301  alive   client  1.12.4  2         mydc  default    <default>
Run openldap As Potluck Image
Download The openldap Image
$ pot import -p openldap-amd64-13_1 -t 1.6.17 -U https://potluck.honeyguide.net/openldap
Setup and Start The openldap Image
Again adjust the interface name and IP address below:
$ pot clone \
  -P openldap-amd64-13_1_1_6_17 \
  -p openldap-clone \
  -N alias -i "igb0|10.20.0.3"
$ pot mount-in -p openldap-clone -d /mnt/data/jaildata/openldap -m /mnt
$ pot set-env -p openldap-clone \
  -E NODENAME=ldap \
  -E DATACENTER=mydc \
  -E IP=10.20.0.3 \
  -E GOSSIPKEY="BBtPyNSRI+/iP8RHB514CZ5By3x1jJLu4SqTVzM4gPA=" \
  -E CONSULSERVERS=10.20.0.2 \
  -E DOMAIN=ldap.local \
  -E MYCREDS="password" \
  -E HOSTNAME=ldap.local \
  -E DEFAULTGROUPS=Y \
  -E USERNAME=matrixuser \
  -E PASSWORD=matrixpass
$ pot set-attr -p openldap-clone -A start-at-boot -V True
$ pot start openldap-clone
Again, these 6 commands are enough to download and run a completely configured openldap server.
Note: This image is also preconfigured for redundant multi-master setups.
Optional: Test openldap
You can now connect to the running pot (i.e. jail) and check if openldap is working correctly:
$ pot term openldap-clone
$ ldapsearch -LLL -x -H ldapi://


dn: dc=ldap,dc=local
objectClass: organization
objectClass: dcObject
dc: ldap
o: ldap

dn: ou=People,dc=ldap,dc=local
objectClass: organizationalUnit
ou: People

dn: ou=group,dc=ldap,dc=local
objectClass: organizationalUnit
ou: group

dn: cn=mail,ou=group,dc=ldap,dc=local
objectClass: posixGroup
gidNumber: 3000
cn: mail

dn: uid=matrixuser,ou=People,dc=ldap,dc=local
objectClass: posixAccount
objectClass: shadowAccount
objectClass: inetOrgPerson
cn: matrixuser
sn: genericuser
uid: matrixuser
uidNumber: 5000
gidNumber: 5000
homeDirectory: /home/matrixuser
loginShell: /bin/sh
userPassword:: *encrypted string*
If everything looks good, you can press Ctrl-d to exit the openldap-clone pot.
Run matrix-synapse As Potluck Image
Download The matrix-synapse Image
$ pot import -p matrix-synapse-amd64-13_1 -t 1.2.3 -U https://potluck.honeyguide.net/matrix-synapse
Setup and Start The matrix-synapse Image
For live usage, remove NOSSL parameter and have certificate registered. The ssh key can also be adjusted to the correct path.
Again, also adjust IP address and interface name if necessary.
$ pot clone \
  -P matrix-synapse-amd64-13_1_1_2_3 \
  -p matrix-clone \
  -N alias -i "igb0|10.20.0.4"
$ pot mount-in -p matrix-clone  -d /mnt/data/jaildata/matrix -m /mnt
$ pot copy-in -p matrix-clone -s /root/.ssh/id_rsa.pub -d /root/importauthkey
$ pot set-env -p matrix-clone \
  -E DATACENTER=mydc \
  -E CONSULSERVERS="10.20.0.2" \
  -E GOSSIPKEY="BBtPyNSRI+/iP8RHB514CZ5By3x1jJLu4SqTVzM4gPA=" \
  -E NODENAME=matrix \
  -E IP=10.20.0.4 \
  -E DOMAIN=matrix.local \
  -E ALERTEMAIL="solo@nowhere.net" \
  -E REGISTRATIONENABLE=false \
  -E MYSHAREDSECRET=complicatedpassword \
  -E SMTPHOST=mail.local \
  -E SMTPPORT=25 \
  -E SMTPUSER="solo@nowhere.net" \
  -E SMTPPASS="password" \
  -E SMTPFROM="matrix@ldap.local" \
  -E SSLEMAIL=none \
  -E LDAPSERVER=10.20.0.3 \
  -E LDAPPASSWORD=password \
  -E LDAPDOMAIN=ldap.local \
  -E CONTROLUSER=true \
  [ -E NOSSL=true ]
$ pot set-attr -p matrix-clone -A start-at-boot -V True
$ pot start matrix-clone
Again, just 6 commands are needed to run a matrix-synapse server connected to the openldap server from the previous chapter.
Connect With a Matrix Client
You can find a suitable Matrix client at https://matrix.org/clients/
Connect with your server’s URL and the matrix user and password you created, e.g. for testing purposes the matrixuser account created by configuring the openldap image above or by using the LDAP Account Manager below.
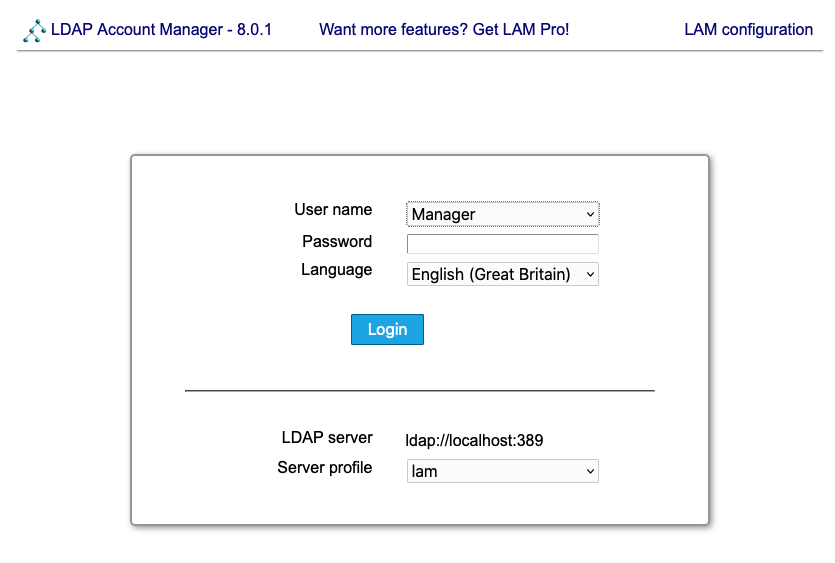
Using LDAP Account Manager or LAM
LAM is a web front-end to openldap which is listening on the IP address you have assigned to the openldap pot above.
The openldap image already includes a pre-configured setup, so you can directly log in with user Manager and the password you set by configuring the openldap image.
You can use this interface to add new accounts or edit existing ones:
The following screens show how you can easily use basic functionality.
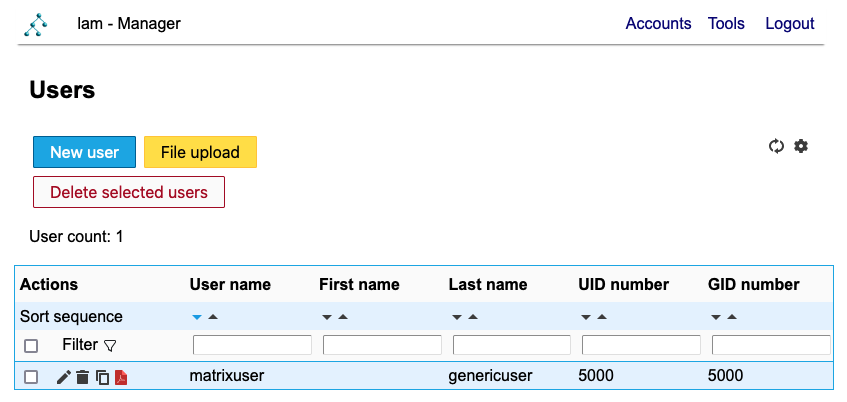
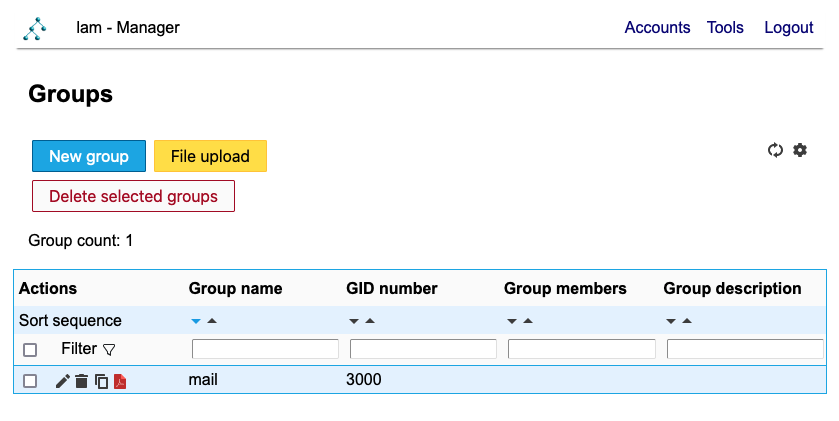
You can flip between Users and Groups by clicking Accounts and hovering:

The defaul page on login is the user list:
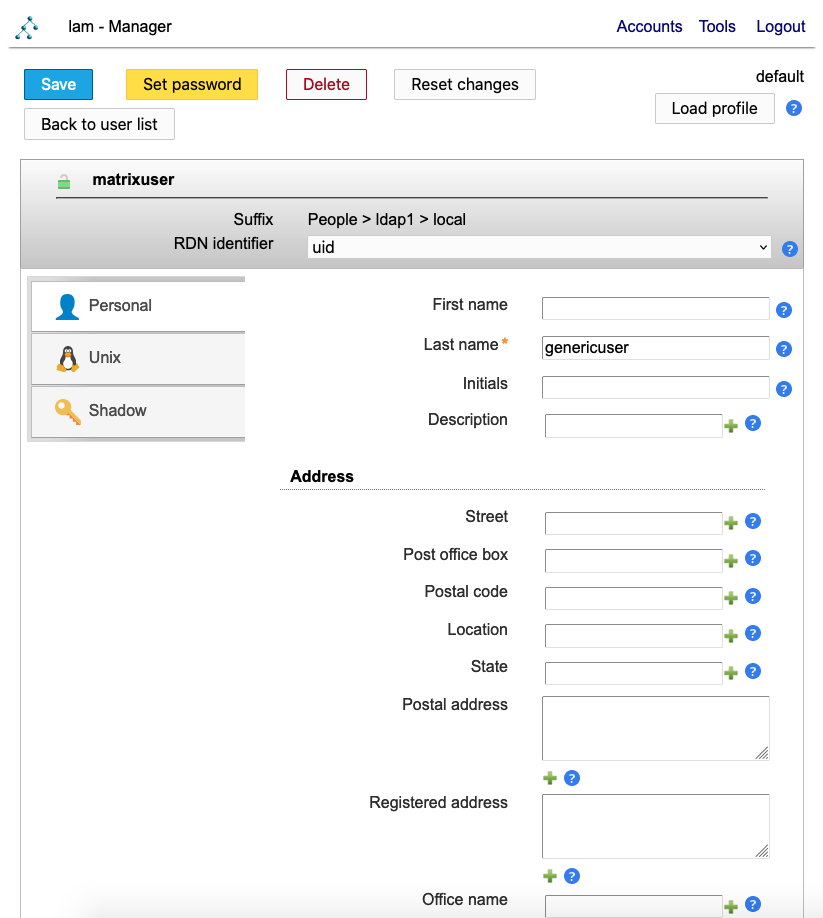
Edit a user to see more details and adjust fields:
UNIX details can be edited too:
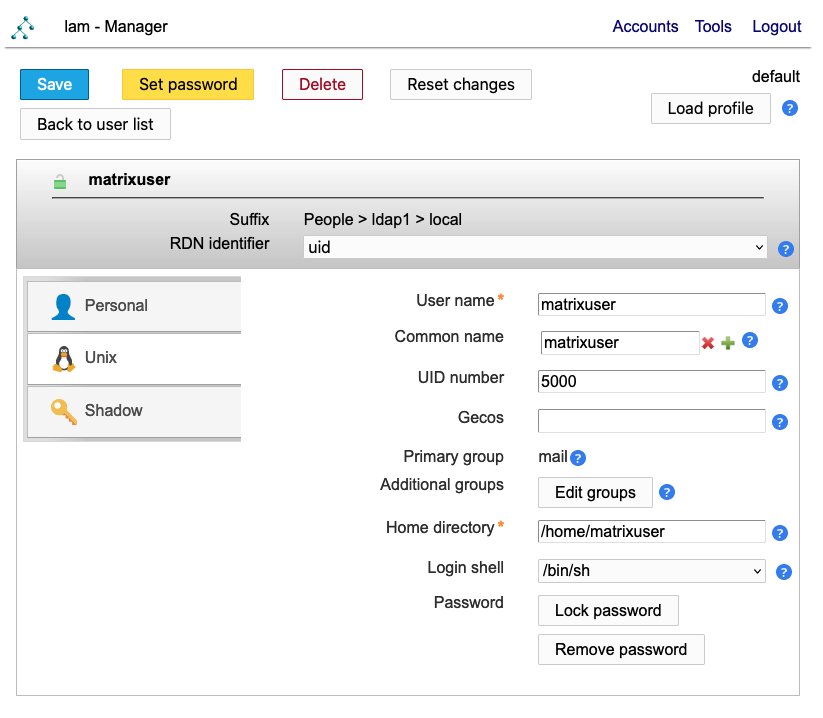
Groups have mail as a default group:
Server information is available via the tools menu:

Alternatively: Try the Openldap-Matrix-Sampler Environment
There is a sampler you can try at openldap-matrix-sampler which includes a multi-master openldap setup on a single host for demonstration purposes.
It closely matches the setup above, but with two openldap servers.
Normally each openldap pot jail would run on a separate host for redundancy reasons.